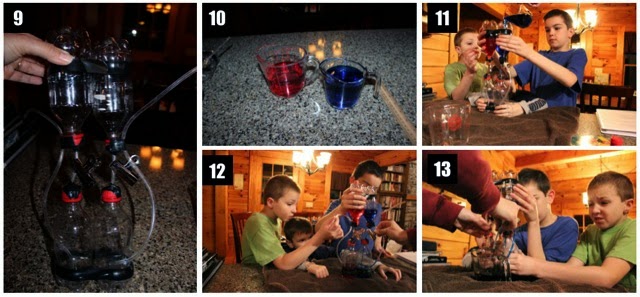
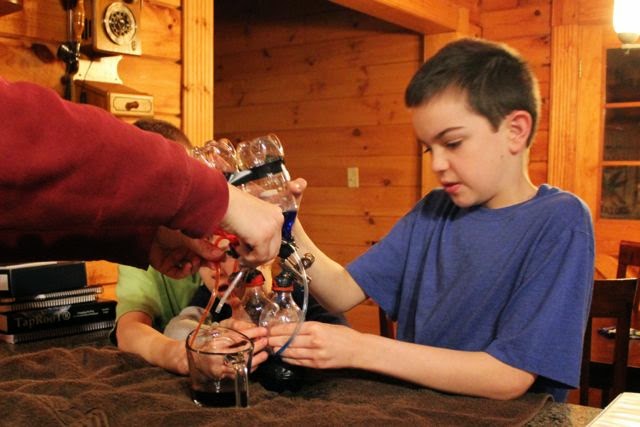
Although this experiment took some prep time and was a bit messy, the boys loved it! This model gave us a springboard for discussion about how oxygen-depleted blood is pumped to the lungs and oxygen-rich blood is pumped to the body – all at the same time!
Purpose: Students will make a working model of a four-chambered heart.
Materials:
- Four small soda or water bottles with lids
- Two large bulldog clips
- Two pourable measuring cups (or small pitchers)
- Two pieces of clear plastic tubing about 12 inches long
- Two pieces of clear plastic tubing about 4 inches long
- Red and blue food coloring
- Electrical tape
- Modeling clay
- Water
Procedure:
- Make a small hole in the lid of each bottle to fit the plastic tubing through.*
- In the bottom of two of the bottles, make a hole about 1/2 inch in diameter.
- On the sides of the other two bottles, make a small hole (to fit the plastic tubing through) about two inches from the top. [Note: Photo shows holes lower than they should be due to a miscommunication with my dear husband who was drilling the holes in an effort to help his science-crazed wife, who wanted to embark on this little learning adventure with the boys.]
- Thread the two pieces of 12-inch tubing into the small holes in the side of the two bottles. Push the tubing to the bottom of the bottles and seal the holes around the tubes with modeling clay.
- Connect two lids together (with their tops facing each other) with the small 4-inch piece of tubing, leaving about two inches of tubing between the lids. Repeat with other two lids and 4-inch tubing.
- Seal holes around tubing with modeling clay.
- To reinforce the seal in #6, tape over the clay with electrical tape.
- Screw all four lids onto the bottles.
- Tape the bottles next to each other in pairs using electrical tape, ensuring that the two bottles with holes in the bottom are next to each other. (You may also want to tape the ends of the longer plastic tubing to the upper bottles to keep them out of the way.) Attach the clips onto the tubing between the lids. These will acts as heart valves, allowing the fluid to flow only in one direction.
- Mix enough red water and blue water to fill up one of the bottles.
- Pour red water into the top of one bottle and pour blue water into the top of the other bottle.
- Open the clips to let the fluid (“blood”) flow through the tubes to the lower bottles and then close them again.
- Squeeze the lower bottles, which will cause the “blood” to squirt out of the tubes.
*Another option (though we have not tested it): Instead of putting holes in the lids, wrap enough modeling clay around the tubing to act as a plug in place of the lid.
What’s happening?
The heart is a muscle that pumps blood through the vessels throughout our body. Blood containing oxygen is pumped through the left side of the heart to the rest of the body. When the oxygen in the blood is depleted, it is sent back to the right side of the heart. It is then pumped over to the lungs to receive oxygen and returns once again to the left side of the heart to be pumped through the body.
To further help with this lesson, you might also want to use this human heart coloring page.
To learn more about how your heart works, refer to Unit 7: Body Organs of the free ebook Classic Elementary Life Science. Be sure to also download the corresponding parent text!


